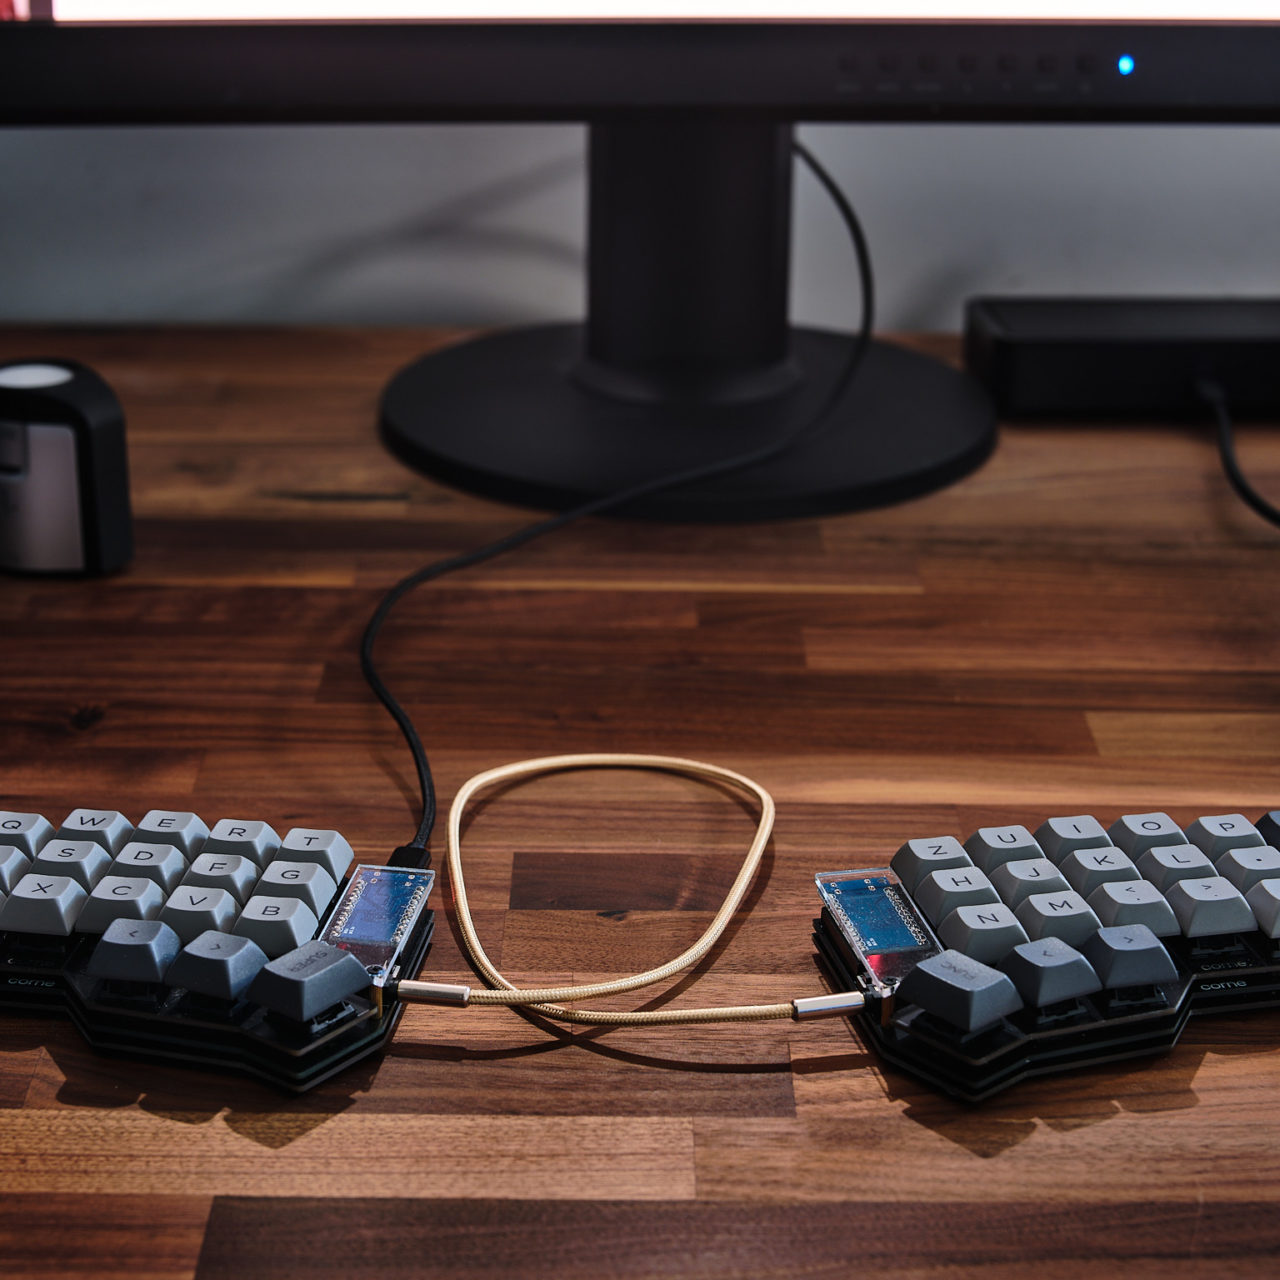
The Corne Keyboard came after a weird search for more ergonomic design for my photography retouching as well as writing. So here is a review of this keyboard, based on some very specific needs.
A split ortholinear keyboard
Most keyboards are staggered as were typewriters back in the day. It was a mechanical necessity at first but it’s no longer the case. It is now based only on habits and isn’t truly optimised. Yet most people feel most confident using a regular keyboard simply because they’ve known it for the longest.
On the other hand, an ortholinear keyboard is simply a keyboard where the keys are arranged in a square grid. In this particular keyboard it isn’t exactly that because it follows the finger’s length to try to be a bit more ergonomic.
So why a Corne keyboard for photography editing?
I tried a couple different things starting from a normal keyboard, moving to a Razer Tartarus (my review) to a Vortex Core. Each have their own set of pros and cons for sure. The Razer was nice and all but it always felt a bit like a gadget to me as it only had one purpose. Each time I wanted to use it, I had to move my keyboard, my tablet and then bring it in. The joystick was probably the best thing on it, maping undo, redo and zoom on a single control. The Vortex Core was a choice a bit out of curiosity and the reasoning behind using it was simply that a smaller keyboard allowed me to bring the mouse/tablet closer and be in a more ergonomically correct position. But compared to the Razer, it was a step back in terms of comfort. The mapping was a bit less easy and it didn’t totally solve the problem of doing one handed shortcuts.
All that to say, the Corne Keyboard allows a bit of both worlds coming together. Macros, good positioning and using the thumb almost to its full extent allowing for quite a lot of shortcuts being done without using the pinky finger.
I also considered the gergoplex, but due to a shortage of pieces I decided not to wait on it.
The build
I didn’t build this keyboard, a good friend of mine did (Hi Nico!). It involved a bit too much soldering for me to be comfortable doing it. I guess it’s probably the main barrier of entry apart from the price. Based on my friend experience, the build was “easy enough” for someone with a bit of experience in soldering. The qmk flashing was also done by him, so maybe I am too much of an assisted person. I’ll let you decide.
All the pieces come from a website called 42keebs.eu Which not only offer a good selection but also the nicest prices on this particular Corne keyboard. Only the keycaps come from another place, namely KPRepublic.
I tried to keep the price down in all parts. For the switches, I went Jwick tactile with a hot-swappable pcb as 42 keebs had them in stock and I would only be charged for import duties. The keycaps are laser engraved DSA profile and were bought mainly for their look, profile, material and price.
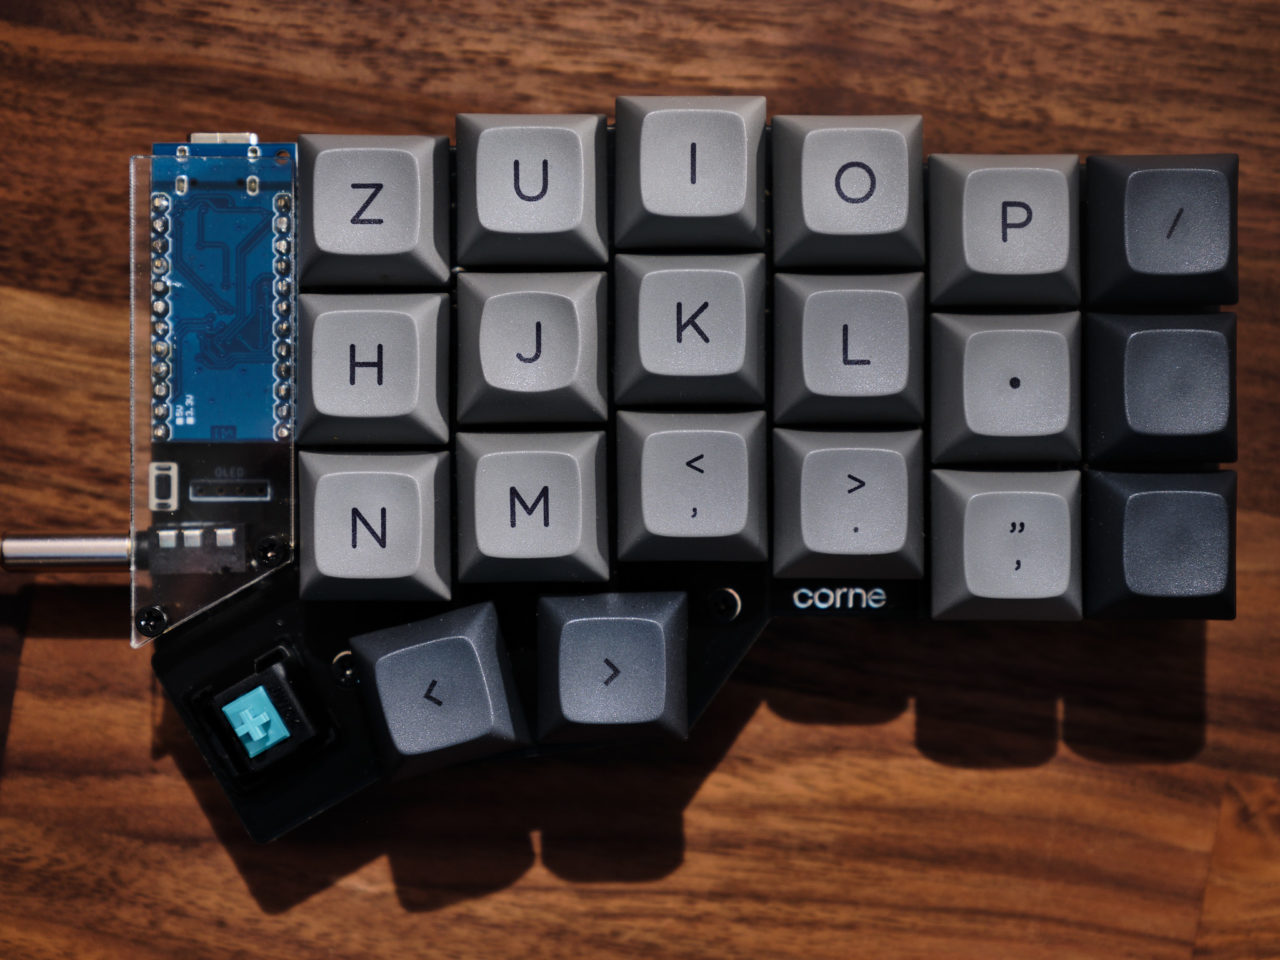
No leds nor displays were used as I don’t want to look at the keyboard while using it. But more on that later.
In use (generic)
It takes time to adapt to a new keyboard, let alone a split ortholinear. But it is totally manageable in just a couple of days. I would even say that I was pretty much back at my speed from before the switch in less than a week.
What takes much longer is adaptating the shortcuts and layers to perfectly suit ones need. As you might not know, it’s totally customisable and each key can be remapped. I use VIA for this task, which works really well apart from a small detail, it’s made for ANSI keyboard and not ISO so keybinding must be done through trial and errors. It is a bit weird to write in French at first but ça passe crème maintenant.
In terms of real use, I must say it’s really great. The three thumb switches save me from contorting my hand too much. For the complex shortcuts, such as cmd+option+shift+E, a simple macro helps (I don’t know who invented these kind of shortcuts but he/she is a total sadist.) In fact, this system is so good that I can have a num pad directly at the press of a button, while another let me have symbols as well as arrow keys.
In use (my gear)
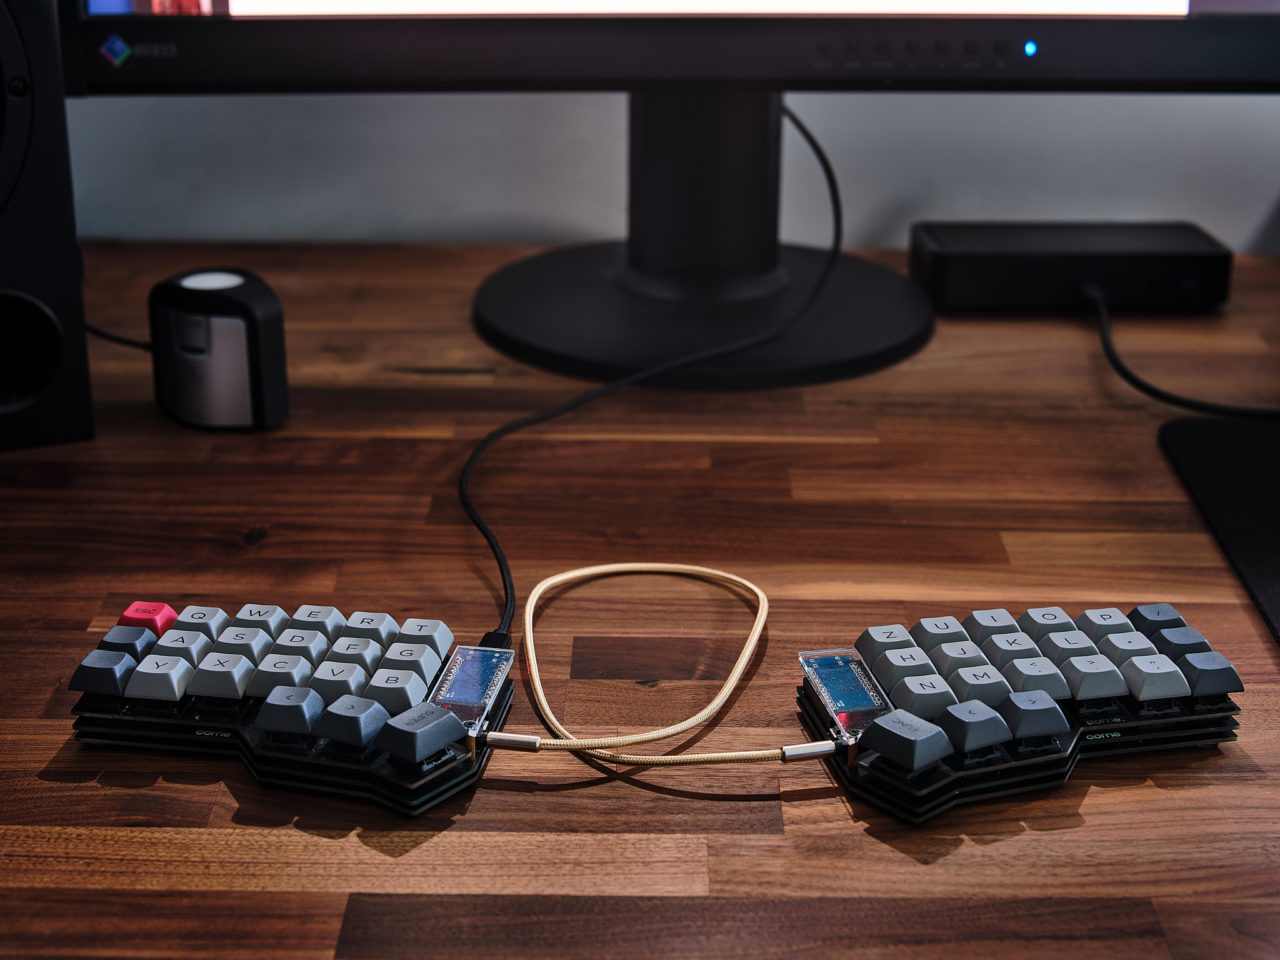
This Corne keyboard is an open case. I feel it’s definitely not the most refined experience one can get but it works. Apart from the sound which is probably a bit amplified, there is some issues with dust collecting everywhere. The bottom plate was also very slippery so I simply put some rubber feet. Again, not the most refined solution.

The switches are Jwick tactile. I’m in no way an expert on switches. In fact far from it. I tried Mx red, brown and blue on my keyboards and tried some switches (Gateron, Romer-G, Razer) on keyboard on display in stores. None really prepared me for the amount of tactility the T1 provides. It really feels nice and I don’t bottom out as much as before. I went back to a MX brown just for fun and it felt almost like scratchy linear in comparison.
Finally, the keycaps. They look great in my opinion, both on photo and in real life. The texture on them feel a bit coarse almost dusty but nothing too bad. I opted for DSA as I quite like this uniform profile and it’s easier to change letters on non qwerty layouts. The real question will be about durability on the laser etched letters.
My layout system
QMK and VIA allow a level of customisation that is absolutely stunning. Not only can you change every key on your keyboard to do something else but you can make keys do multiple things. For exemple, you can make a key do backspace when tapped and switch layer when held.
And what are those layers? Imagine you can have 4 keyboard in one, each layer corresponding to a keyboard. So on one layer, a key will be a letter, on another it will be a special character while on the 3rd and 4th it can be a Shift. Let’s regroup all those layers and call it a layout.
A layout is a very personal thing, I refine it quite often and don’t consider it is mature enough to be released in the wild. So here is the general principles behind my choices. Keep in mind that I’m right handed.
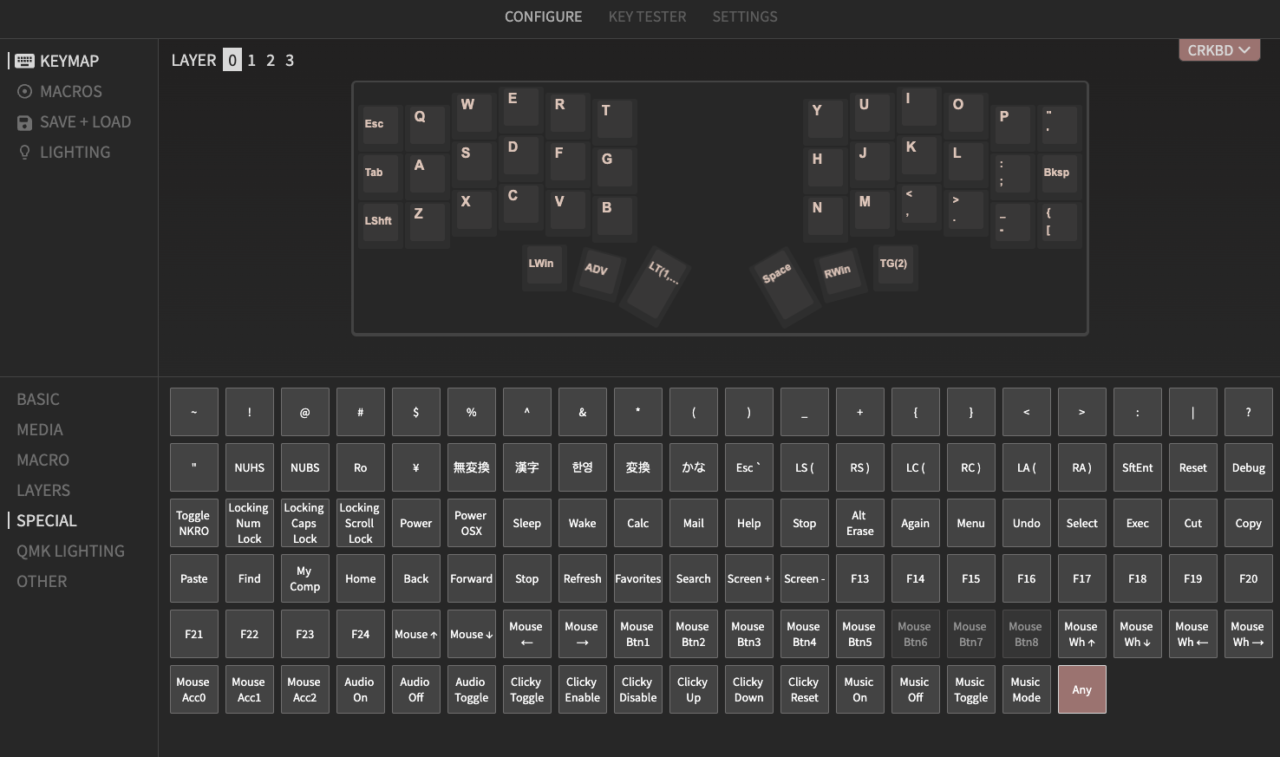
Base layer is the most normal with all the letters, basic punctuations, basic French accentuated letters as well as backspace, space, enter, esc, etc. I still have two backspace buttons and don’t exactly know what to change one into. What would be ideal is to use my thumb to do the backspace every time but it is quite hard for me to learn and I don’t know why.
The first layer is accessed through left thumb button (while pressed) and brings special characters as well as navigation using an arrow cluster on the right hand.
On the right thumb, I’ve put a toggle switch bringing both letters on the left hand for classic shortcuts when retouching and a num pad on the right hand to be more nimble for calculation as well as basic accounting.
Third layer is only accessible through the second layer as it is only used for retouching on the left hand and accounting on the right one.
I guess it is a bit weird splitting the layout between left and right hand but it works pretty nicely for me.
Some of my shortcuts with the Any key
-MT(MOD_LSFT,KC_ENT) acts as a shift key when held and an Enter key when pressed shortly.
-LT(1,KC_BSPC activates Layer 1 when held and does a backspace when pressed rapidly
-MT(MOD_LCTL | MOD_LALT,KC_B) this one does ctrl+alt when held and b otherwise. It’s really useful for retouching as it allows to select a brush and change its size on the go.
Every time I find a new one that works for me there is a little bit of joy and pride as it takes me closer to my ideal keyboard. QMK is well documented and the shortcuts can also be used in VIA
Does it make any difference in my photography workflow?
First of all, it changes how I interact with my computer and brings a bit of freshness and flair to my otherwise boring setup. Truth be told, my setup looks a lot like other setups from photographers where everything is a shade of gray except for a dark accent. (We truly fear color casts). The fact that its color scheme is so dark makes it much less distracting when it comes to peripheral vision.
My shoulders, wrists and hands are also a lot more relaxed because of a more natural position. But strangely enough I find myself slouching a lot more if I don’t pay attention to it. I have yet to find an explanation. Maybe I need to have bad posture someway or another?
I find it also more fun to type for long period of time. I don’t exactly know why but it does, so it’s a nice bonus.
The ability to have all the shortcuts needed on one hand is also a real advantage. Keep in mind though, that I had to only use a selection of them, which is basically 30 keys with modifiers.
Any future improvement?
I tried spending as little time and money as possible with configuring this Corne keyboard while keeping it pleasant to use. The two most obvious improvements would be a case (but I might use the desk as a case) and a more refined layout with more and easier shortcuts. I haven’t been able to make it work with VIAL but it would be nice to use as it allows tap dancing.
When navigating through the different layers, a little indication on the current layer would be nice. And for that it would either be through led or a display. But for now it will have to do without.
A couple encoders would be also very useful for adjustments on the fly. I would say it’s the thing I miss the most. So in retrospect a Lily 58 might be a better solution. Or maybe a macro pad. We’ll see in the future.
And finally, going wireless through a NiceNano! would be quite worth it to use the keyboard on the go.
Would I recommend a Corne keyboard?
To tech savvy people, most definitely. It feels absolutely right once you get the hang of it.
For the not so tech savvy people, I seriously doubt you should try it on your own. Some stores will offer to build it for you as well as flash it and it might well be the right thing to do. And then you can simply use VIA and customise your layouts (or Remap for ISO layouts). However if you go a little deeper such as with Vial or programming Macros, it can become overwhelming quite fast.
For photographers who only need a way to speed their editing and retouching workflow, I think a loupe deck, a modded behringer or even a Razer Tartarus can suit your needs better. If you want to have fun, need a keyboard and don’t want those nice encoders and wheels (because you use Capture One Speed Edit for example) then why not try it. In the end, even if not used for editing, this keyboard is a joy to use as a regular one.
Update: After a couple of months of use, I can say this Corne keyboard changed totally how I interact with my computer. There is so much I can do without lifting my hands. In fact, with the exception of mouse movement, I don’t move at all. Even the external columns are used very little. I would like to not use them at all as I feel it’s so much better without them, but the à and è letters are still on the left pinky.
Another big change is how home row change the flow of the Corne keyboard. I can access all the modificators (such as alt, cmd, ctrl and shift) by simply holding one of the home row finger. It’s still not perfect as I need to go against many years of mods using my pinky finger. But once you use them, you simply wonder why it’s not more common. (For it to work, you need to dig deeper than regular keyboard use. I needed to put a line in the config.h file before compiling and flashing the keyboard. Nothing that homebrew can’t do but it felt important to tell).
I also changed the switches to Lavender Purple as they are lighter to use and make this Corne Keyboard even nicer for photography workflow.